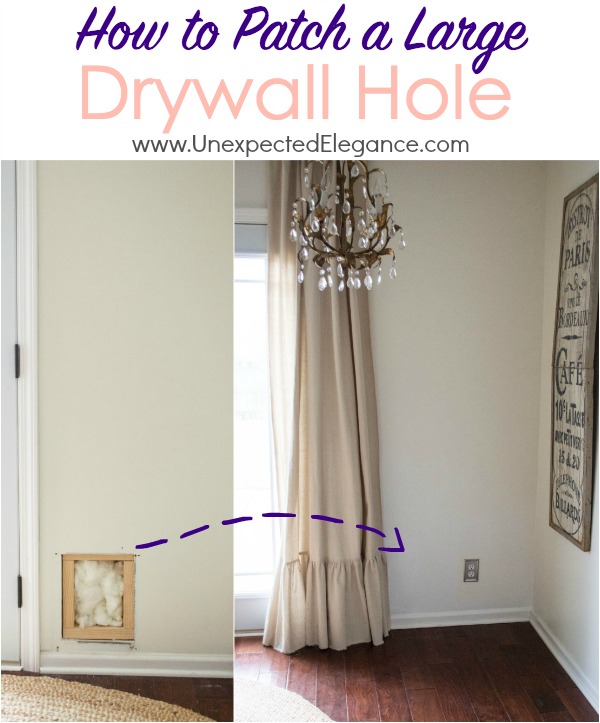
Fixing a large drywall hole may feel overwhelming, but with the correct techniques and tools, it can be a straightforward DIY project. Whether the damage is due to accidents, general wear and tear, or renovations, mastering how to patch a large drywall hole is an invaluable skill for any homeowner. This detailed guide will walk you through each step, ensuring your walls regain their original appearance.
Addressing a large drywall hole isn't merely about enhancing your home's aesthetics; it's also crucial for maintaining the structural integrity of your walls. Neglected holes can weaken the wall structure and lead to further damage over time. By tackling the issue promptly, you can avoid more expensive repairs in the future.
This article will cover everything you need to know about repairing large drywall holes, from preparation to the final finishing touches. Whether you're a novice or an experienced DIY enthusiast, you'll discover practical tips and techniques to simplify and improve the repair process.
Read also:Michael Caines The Culinary Maestro Redefining Fine Dining
Table of Contents
- Understanding Drywall and Its Importance
- Tools and Materials Required
- Preparing the Area for Repair
- Effective Patching Techniques for Large Holes
- Cutting Drywall for Clean Edges
- Adding Backing for Stability
- Applying Joint Compound Properly
- Sanding and Perfecting the Finish
- Painting the Repaired Section
- Strategies for Preventing Future Damage
Understanding Drywall and Its Role in Construction
Drywall, also known as plasterboard or gypsum board, is a widely used material for interior walls and ceilings. It offers a smooth, even surface for painting and decorating while providing fire-resistant properties. Familiarizing yourself with the basics of drywall is essential when undertaking repairs, especially for large holes.
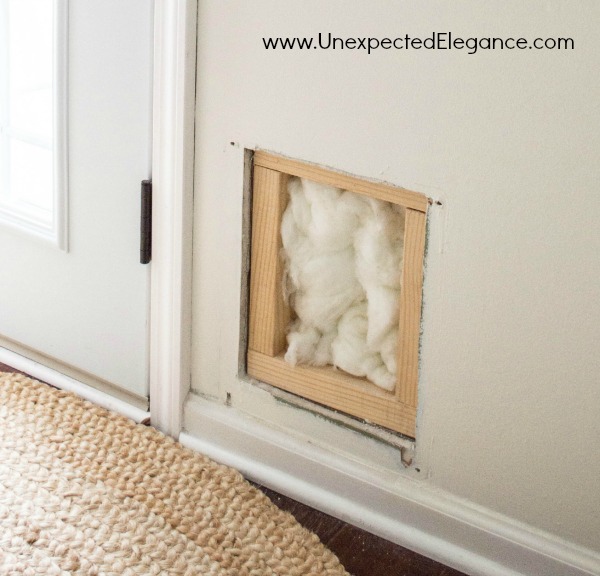
Large drywall holes can significantly compromise the structural integrity of your walls, making timely repairs crucial. Patching such holes involves more than just filling the gap; it requires careful preparation, quality materials, and precise techniques to ensure a strong and flawless repair.
Why Drywall is a Preferred Material in Construction
- Cost-effective and easy to install
- Fire-resistant and enhances safety
- Provides a smooth, paint-ready surface
- Lightweight yet durable
Tools and Materials Required for the Job
Before beginning the repair process, it's essential to gather all necessary tools and materials. Having everything prepared beforehand will streamline the process and make it more efficient. Below is a list of items you'll need to patch a large drywall hole:
- Drywall saw or utility knife
- Drywall screws
- Wooden or metal backing strips
- Drywall patch or a piece of new drywall
- Joint compound
- Sandpaper or drywall sanding screen
- Drywall tape
- Putty knife
- Paint and primer
Investing in high-quality tools and materials will yield better results and save you time in the long run.
Preparing the Area for a Successful Repair
Thorough preparation is vital for a successful drywall repair. Begin by clearing the area around the hole and carefully removing any loose or damaged drywall pieces. This will provide a clean surface to work on and minimize the risk of causing additional damage during the repair process.
Safety Precautions to Keep in Mind
When working with drywall, taking safety measures is crucial to protect yourself and your surroundings:
Read also:Natalie Portman The Iconic Journey Of A Hollywood Star
- Wear safety goggles to shield your eyes from dust and debris.
- Use a dust mask to avoid inhaling drywall dust particles.
- Cover furniture and floors with drop cloths to protect them from dust and spills.
Adhering to these precautions ensures a safe and efficient repair experience.
Effective Patching Techniques for Large Holes
Several methods can be employed to patch a large drywall hole, each suited to specific scenarios. The chosen method depends on factors such as the hole's size and location, as well as the materials available. Below are some common techniques:
1. Utilizing a Drywall Patch
A drywall patch is a pre-cut piece of drywall with adhesive backing, ideal for smaller holes but also usable for larger ones with added support. Simply cut the patch to fit the hole and press it into place, securing it with screws or nails.
2. Cutting and Replacing Damaged Drywall
For larger holes, cutting out the damaged section and replacing it with a new piece of drywall is often the best approach. This involves removing the damaged area, installing backing for support, and attaching the new drywall piece.
Cutting Drywall for Clean Edges
A clean, square edge is essential for a successful drywall repair. Use a drywall saw or utility knife to carefully cut around the damaged area, creating a rectangular or square shape. This will make it easier to install backing and attach the new piece of drywall.
Ensure the cut edges are smooth and even to achieve a seamless fit with the new drywall piece.
Adding Backing for Stability
When repairing a large drywall hole, installing backing is critical for providing support to the new drywall piece. You can use wooden or metal strips depending on your preference and availability. Here's how to install backing:
- Cut the backing strips to fit the dimensions of the hole.
- Secure the strips to the back of the drywall using drywall screws.
- Ensure the backing is firmly attached and flush with the surrounding drywall.
Properly installed backing will prevent the new drywall piece from sagging or becoming loose over time.
Applying Joint Compound for a Smooth Finish
Joint compound is used to fill gaps and create a smooth surface between the new drywall piece and the surrounding area. Follow these steps for applying joint compound:
- Apply a thin layer of joint compound over the seams and screws using a putty knife.
- Embed drywall tape into the wet compound to reinforce the seams.
- Allow the compound to dry completely before applying additional layers.
Apply multiple layers of joint compound, sanding between each layer, to achieve a flawless finish.
Sanding and Perfecting the Finish
Sanding is a crucial step in achieving a seamless repair. Use fine-grit sandpaper or a drywall sanding screen to smooth out the joint compound and eliminate any rough edges. Be sure to sand lightly to avoid damaging the surface.
After sanding, carefully inspect the area for any imperfections or areas that may need additional compound. Make any necessary adjustments before proceeding to the final step.
Painting the Repaired Section
The final step in repairing a large drywall hole is painting the area to match the surrounding walls. Begin by applying a primer to the repaired section to ensure proper adhesion and coverage. Then, use a paint roller or brush to apply the paint, blending it seamlessly with the existing wall color.
If the wall features a textured finish, consider using a texture spray to replicate the original texture before painting.
Strategies for Preventing Future Damage
After successfully repairing a large drywall hole, take steps to prevent future damage:
- Install protective corner guards in high-traffic areas.
- Secure heavy objects to the wall using appropriate anchors.
- Regularly inspect walls for signs of damage and address issues promptly.
By implementing preventive measures, you can maintain the integrity of your walls and avoid costly repairs in the future.
Conclusion
Repairing a large drywall hole is a fulfilling DIY project that enhances both the appearance and structural integrity of your walls. By following the steps outlined in this guide, you can achieve professional-grade results with minimal effort. Remember to gather all necessary tools and materials, prepare the area thoroughly, and prioritize safety throughout the process.
We encourage you to share your experience or ask questions in the comments below. If you found this article helpful, consider sharing it with others who might benefit from the information. For more DIY tips and tricks, explore our other articles on home improvement and maintenance.
:max_bytes(150000):strip_icc()/repair-a-large-hole-in-drywall-1824831_03_install_patch_1545-68477076e16b4775b65d51fe92b17122.jpg)
